|
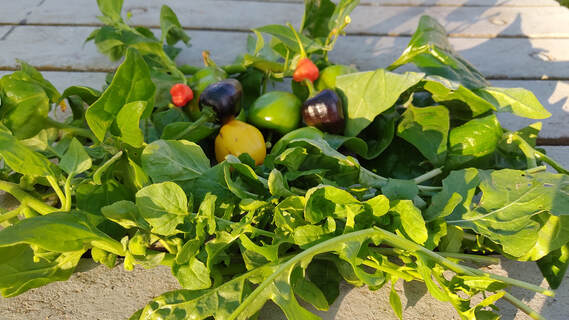
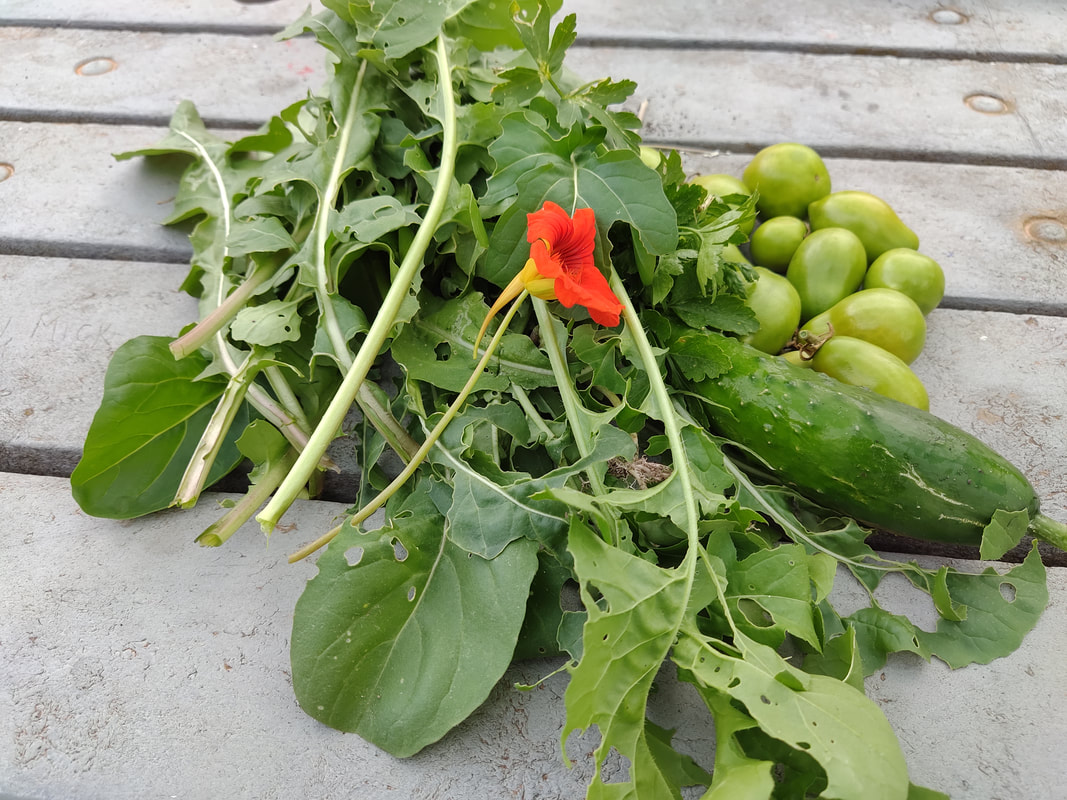
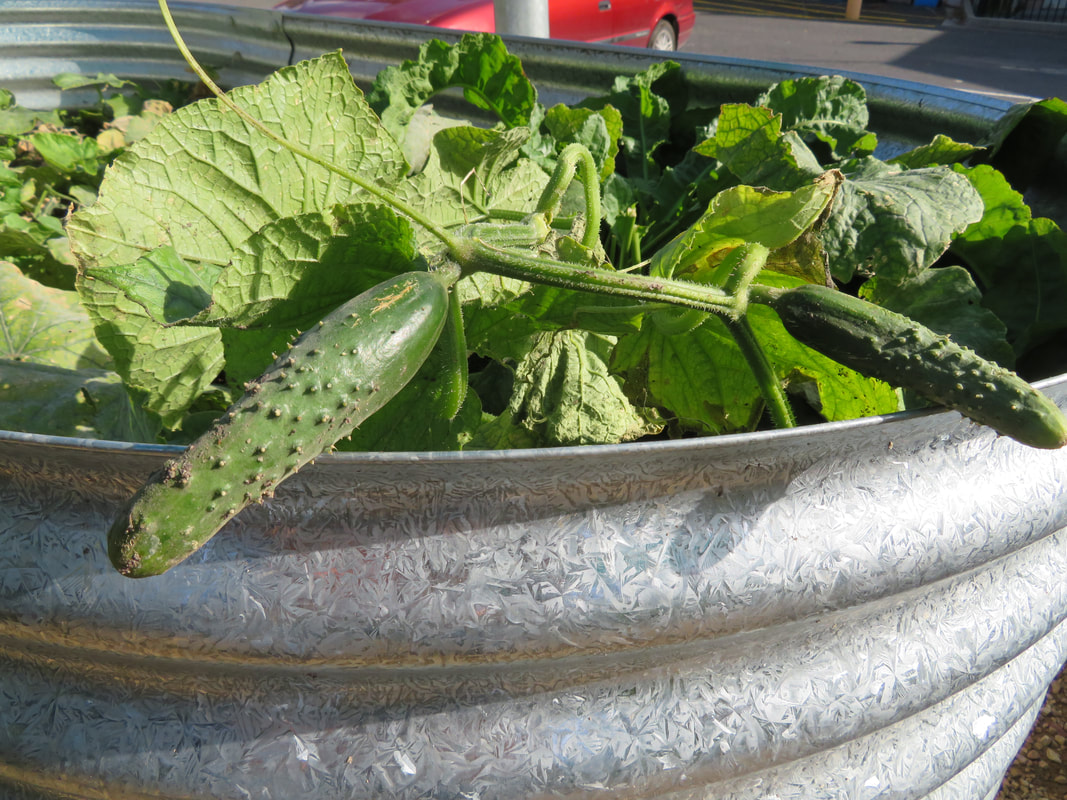
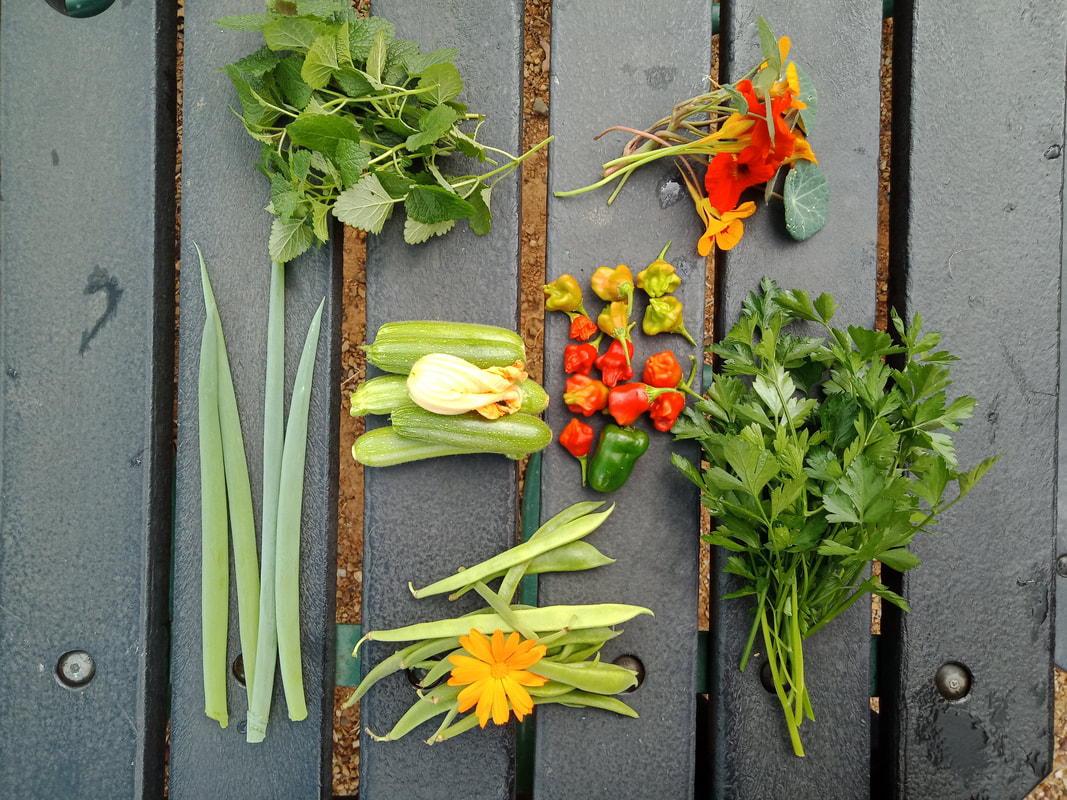
Now that it’s spring we’re all getting some more sunshine and warmth and our gardens are moving into prime growing season too! If you’re anything like us it may feel like for the longest time your little seedlings hadn’t been going anywhere but after a few warm days you now have an abundance! Not sure what to do with all this fresh home grown produce? Well that’s just about the best problem you could have! Read on for some tips on how to use, store and preserve all that home-grown goodness… 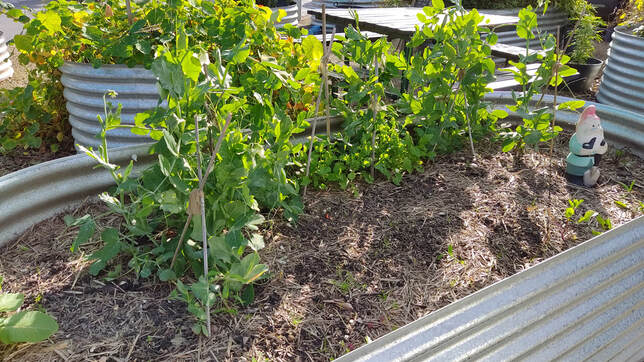 Cooking and consuming As we transition to the warmer seasons, we naturally gravitate to eating more uncooked, fresh salads and raw foods. Eating like this involves adapting our diets to incorporate more of the fresh seasonal produce that’s probably overgrown in our gardens! A simple way to use much of your spring and summer produce is to wash and chop them up raw straight into a salad. This could include:
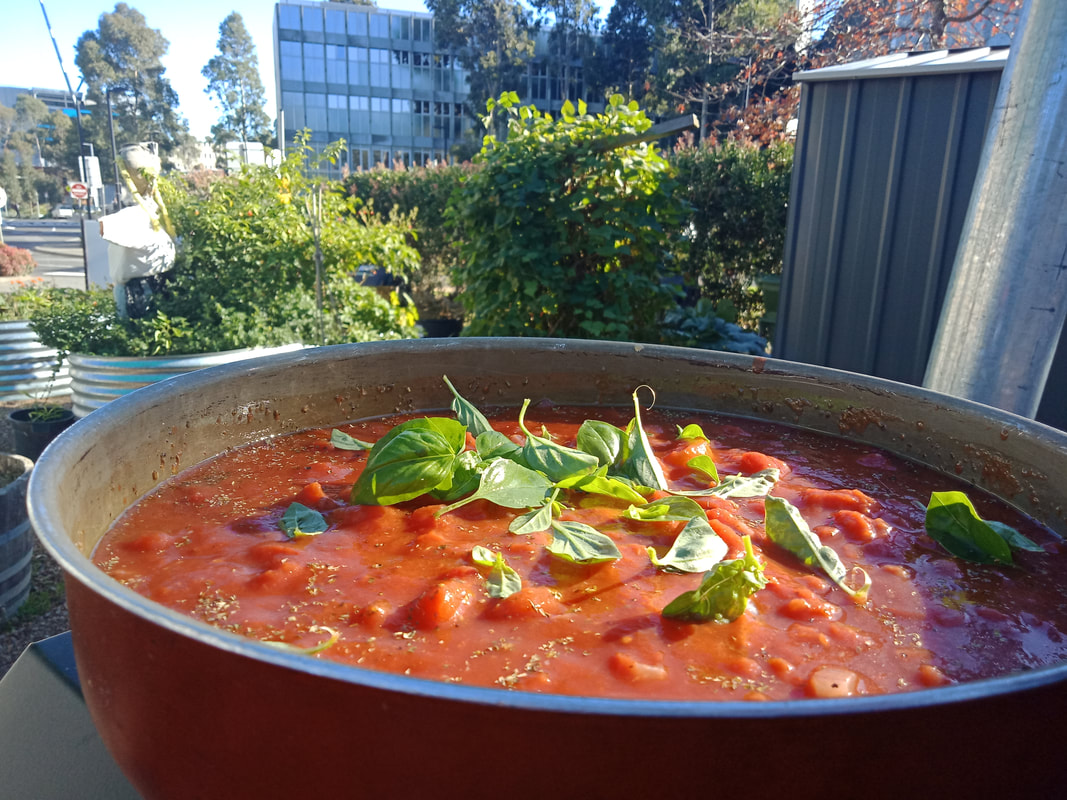
In the cooler months you can easily chop up most veg and pop them into big stews, soups, pasta sauces, curries or other dishes with lots of liquid as either hidden veg or the star of the meal! Storing and preserving There’s plenty of options when it comes to storing and preserving fresh produce and the method you use really depends on the produce you have a glut of. Here’s some general suggestions to get you started but we’d also recommend having a look online for the best method for the specific produce you have oodles of! Storing Before we look at longer term preservation options, let’s consider the best way to store your garden produce to keep it fresh and delicious when you bring it into your kitchen.
If you’ve got too much of something and you know you’re not going to use it all, rather than waste it, why not preserve it? Freezing
 Sharing & Caring
Though sharing your excess fresh produce may be a little trickier these days, it is still possible with a little creativity! Though we unfortunately can’t meet up for a good ol’ fashioned food swap and potluck there are some great alternatives:
So go ahead and get out there, harvest some produce and get tasting! Happy harvesting :D
40 Comments
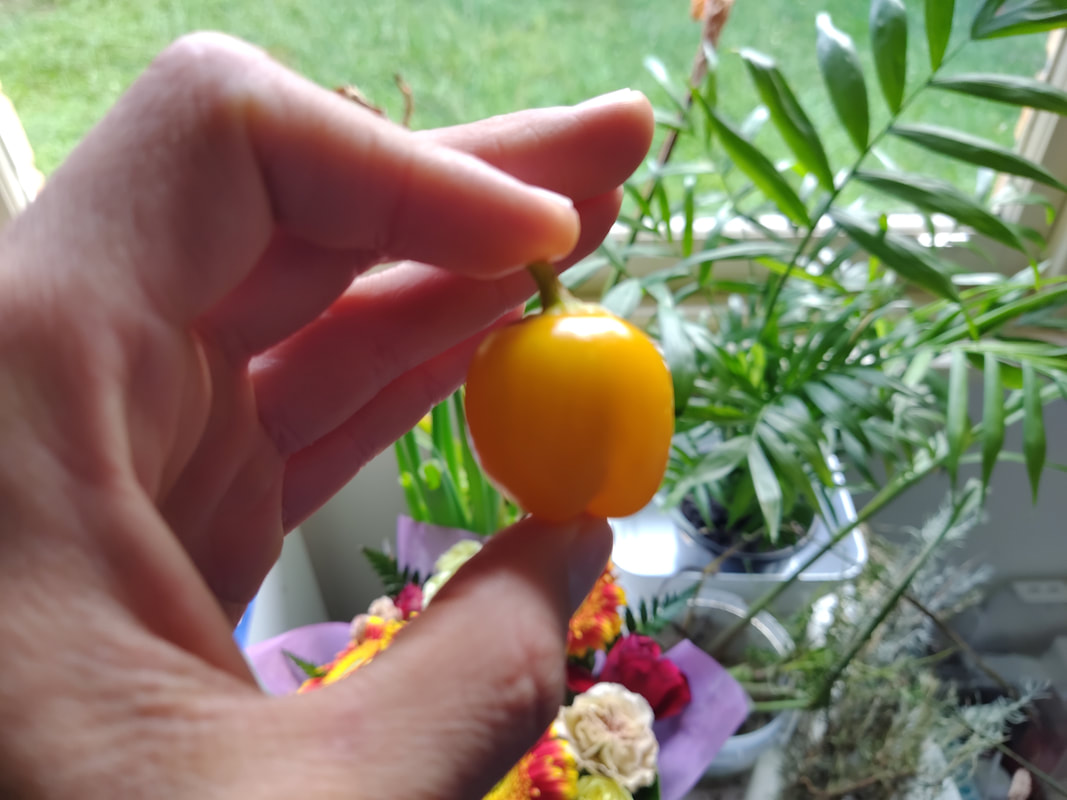
It’s the most wonderful time of the year! Spring is certainly up there with Christmas for all us avid gardeners. This time holds something exciting for everyone, whether you’re carefully watching for new growth appear on your raspberry plant, or simply fascinated by the little skinks that soak up the afternoon sun. Sometimes gardening can get a little overwhelming in spring. Plant growth is accelerating, which is super exciting for our veggies but not so great when it comes to weeds. Your garden may need a bit more water as the days get hotter. With warmer weather also comes six legged beasties who’d like nothing more than to snack on your yield. And probably the most overwhelming of all, the endless possibilities of what you could plant. We’ve compiled a bit of advice, as well as some information on various spring veggies, to help you get started on your spring garden. Let’s tackle the big question first. What do you choose to grow? This might be easy for some to decide on, as often the veggies we use most are the obvious choice. However, there are also a host of fantastic and unusual veggies to consider. Here are a few that we have tried in our own gardens and loved: -Cape gooseberry: Pictured below, these tasty little fruits are super cute, easy to grow and a great addition to your garden. Perfect to make gooseberry jam with or to simply eat off the plant. They belong to the nightshade family and are indigenous to Peru. They’re super easy to propagate and can survive from one year to the next. You can pick up a small gooseberry plant from bunnings or grab some seeds online from The Diggers Club. 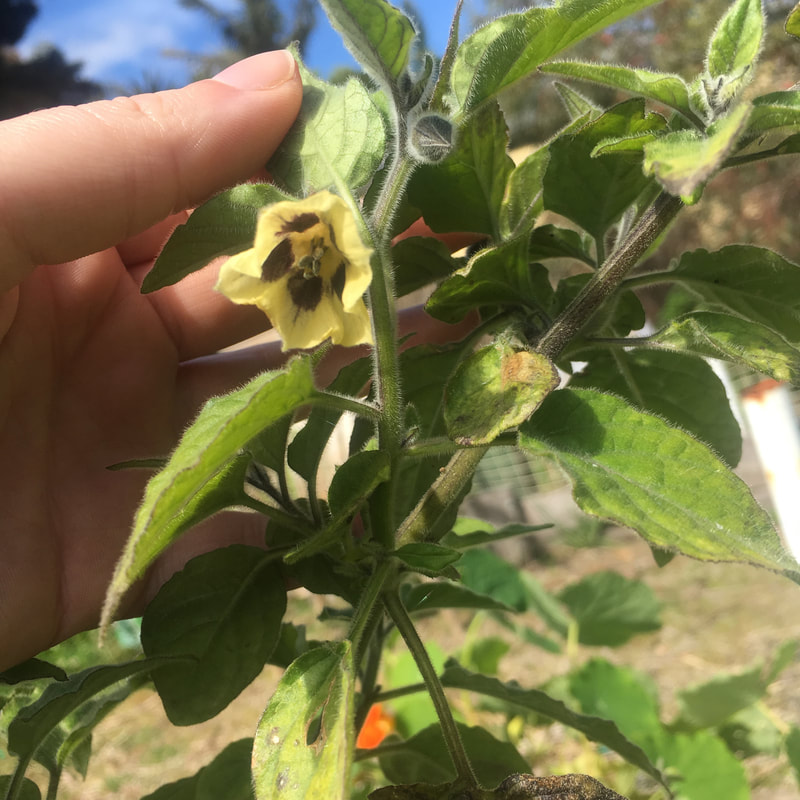 -Kohlrabi: Similar to a cabbage, but much better in our opinion, this fun veggie can sometimes be found at your local supermarket. It’s very versatile and a great addition to any savoury veggie dish and looks awesome in the garden. This one will need to be grown a lot closer to summer, but seeds could be started inside mid- late spring. Again, check out Bunnings and The Digger Club online to grab some seeds. -Pineberry, bubbleberry and strasberry: these unusual berries would make a great addition to any garden. If you’re looking for something sweet and unusual to grow, then look no further. Pineberry and bubbleberry are both strawberry look alikes with unique flavours. Strasberry looks and tastes a bit like raspberry. If you can find an established plant of these (bunnings usually stock them), now is the time to plant to ensure a lovely mid spring to summer yield of berries. Note that these plants will need to be pollinated by a strawberry plant. Other things to consider for your spring garden are the super practical, beautiful and fun flowers. All of these plants are edible (good in salads and teas) and they also attract pollinators and other insect to your garden. Some awesome examples are: -Sunflowers -Nasturtiums -Marigolds -Calendula -Camomile 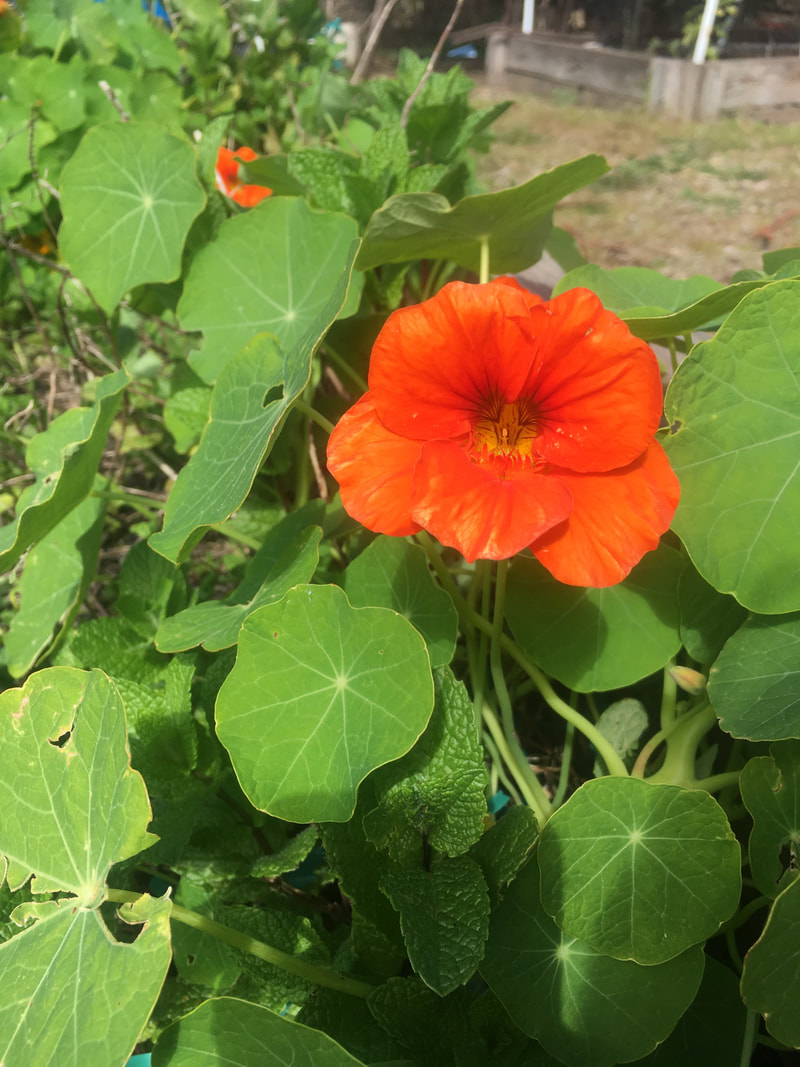 The last type of spring plant and veggies are the super reliable and conventional ones. We think it’s good to choose a few things from each (unusual veggies, flowers and conventional veggies) in order to get the most fun and yield from your veggie patch. Here is a list of our common spring veggies, how and when to plant them: -Capsicum: good to plant between now and start of October. If starting from seed, keep inside/ undercover till October then plant. Will be ready to harvest in December. -Silverbeet: Seeds and seedling are ready to go straight in the ground now. Will be ready to harvest from November -Squash: These ones don’t like frost so good to start from seed/ young seedling inside and then plant out in around 4-6 weeks. Ready to harvest from December. -Parsley: Seeds ready to sow now straight into your veggie patch. Ready to harvest from December -Fennel: Seeds ready to sow now and good to harvest from January -Cucumber: Sow seeds into larger pots. Will be ready in December -Tomato: Begin seeds inside or undercover. Ready to plant in ground in October. Ready to harvest in December -Leek: Sow seeds or seedling straight into garden. Ready to harvest in January. 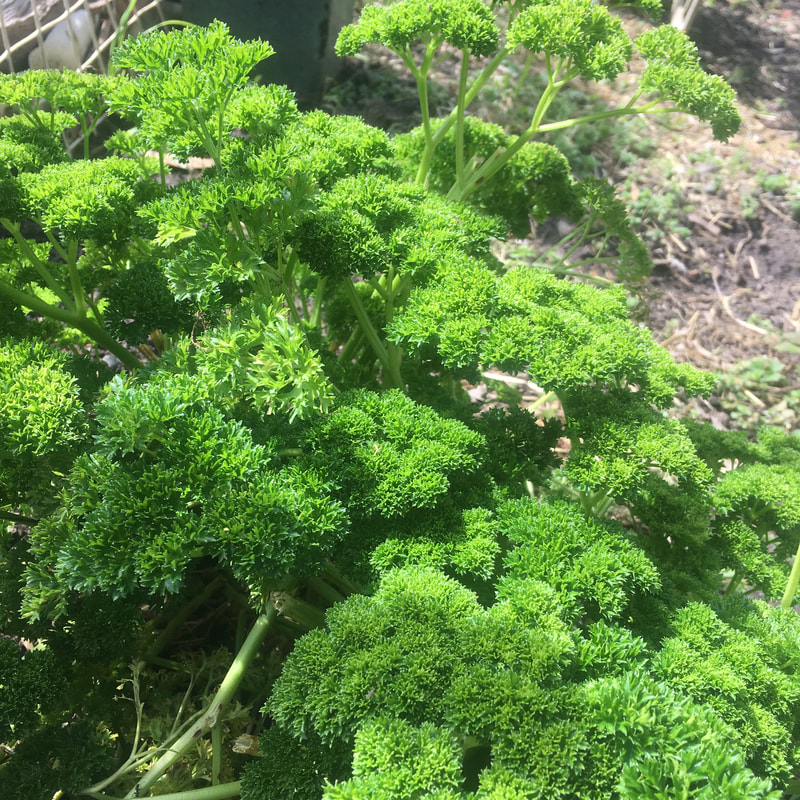 We hope you’re equally as excited for spring as us. Remember to make the most of your spring garden with a variety of fun and practical fruit and veg.
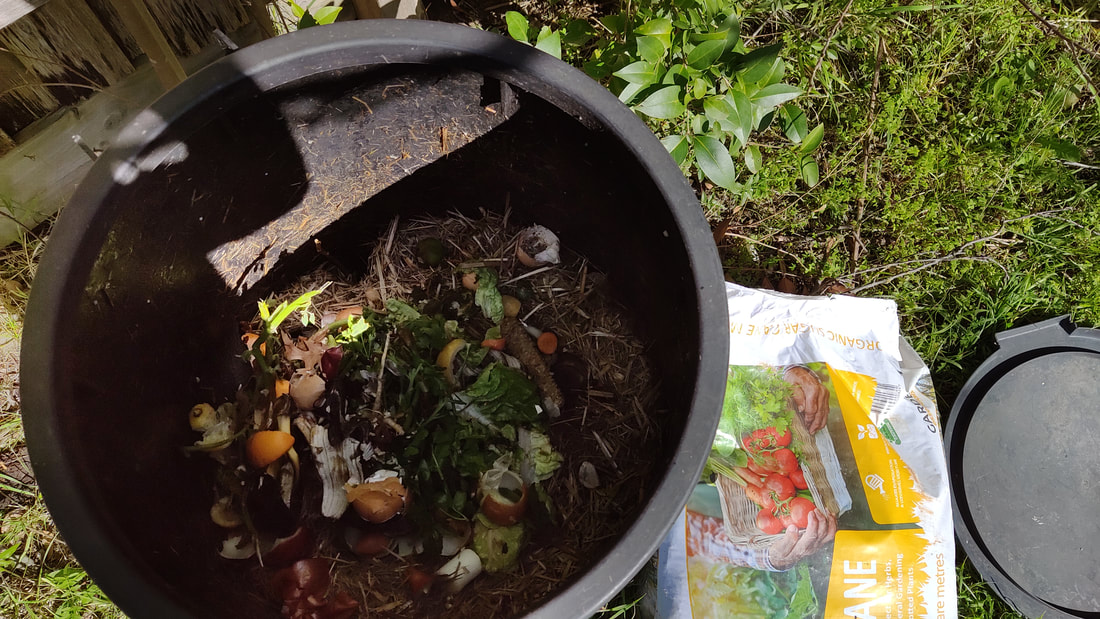
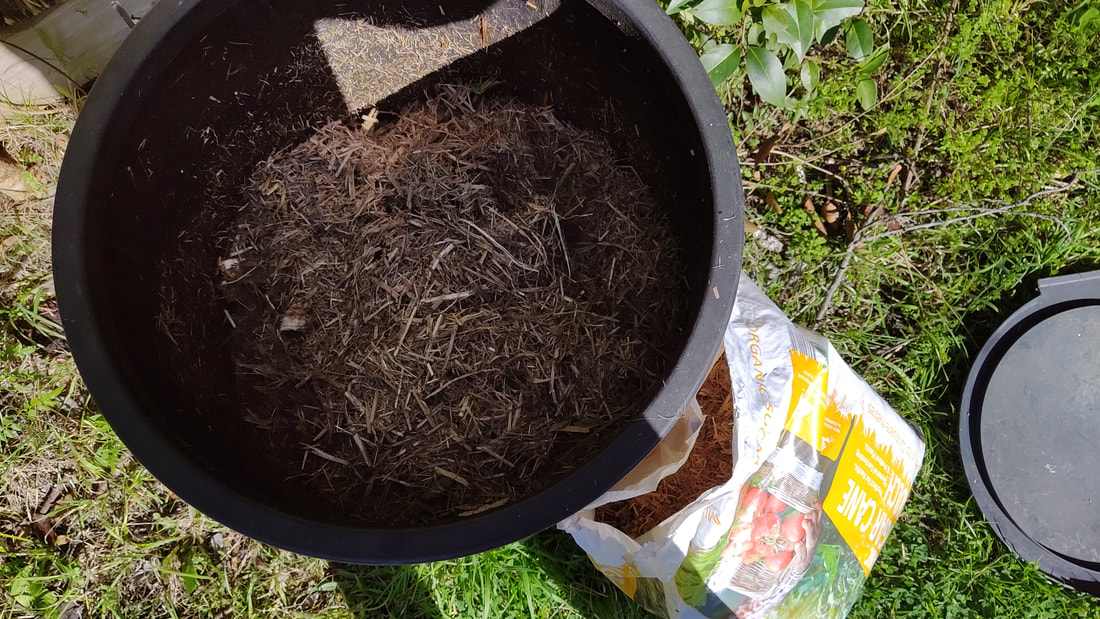
Happy Gardening! 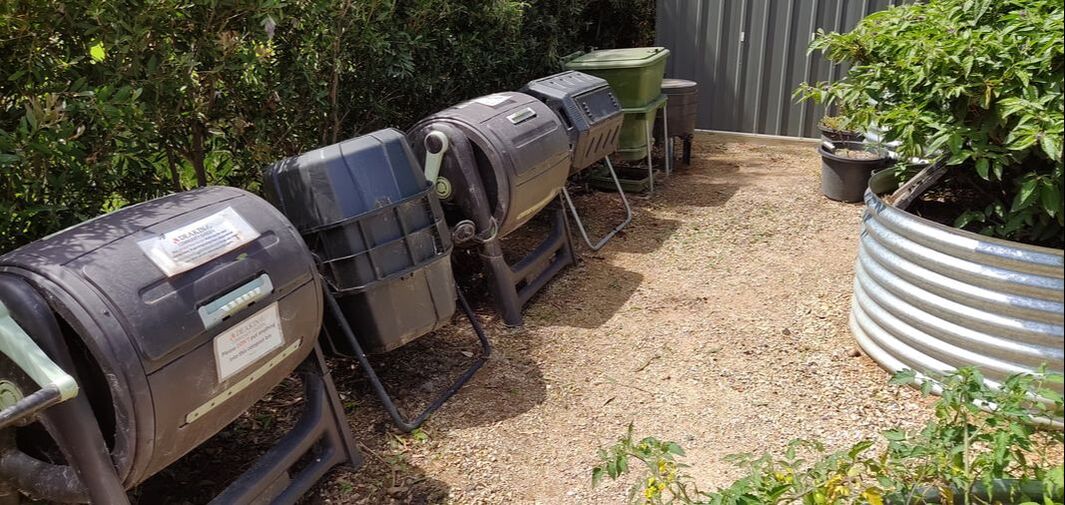 If you’re anything like us here at the Deakin Community garden, you’ve probably gone through a few emotional stages/ learning curves when it comes to composting. Here are the not so official 3 composting stages: 1)The ‘She’ll be right’ stage: Here, you just chuck all your food scraps in a bucket, pop on a lid and say ‘she’ll be right’. You’re feeling pretty good about yourself, like an eco-warrior who is completely dominating in the sustainability game. 2)The ‘Oh my gosh that didn’t work what have I done wrong’ stage: So, you’ve checked your compost and it’s a smelly, mouldy mush. You can even see some whole apples in there with the sticker still attached! Why didn’t the compost fairy remove the sticker for you? Damn compost fairy needs to earn it’s keep! At this stage you’re definitely feeling that composting is super hard and you want out! 3)The ‘I’ve got my act together now’ stage: Congrats, you’ve figured out that composting requires some technique! That’s personal growth right there! In fact, you’re on your way to having some very decent, nutrient rich soil for your garden in a few months! Seriously though, you don’t have to give up your composting dreams just because you’ve had problems in the past or are unsure of where to start. Here are some tips to get started: 1)Start small: Try not to obsess over chucking every single kitchen scrap you create into the compost. The sad reality is it won’t all fit. It’s a lot better for you, your compost, and your neighbours who potentially have to deal with the smell of an unkept compost. Just start small and only compost what you can handle. 2)More leaves, less scraps: you need a good ratio of ‘browns’ or carbons (brown leaves, straw/ hay) to ‘greens’ or nitrogen (kitchen scraps, green lawn clippings/ leaves, coffee grounds, etc). The exact ratio can differ a bit depending on who you ask/ how quickly you’re wanting to compost. A ratio of around 60% browns to 40% greens is what you should aim for. Avoiding ‘woody’ leaves such as eucalypts as they take forever to decompose. 3)Make sure larger scraps are made smaller before adding to the compost: Chopping up scraps with a knife or, if you’re super keen, chucking it in a food processor. This will ensure your scraps break down properly and quickly. 4)Make sure your browns are covering the top of your compost: It’s important that your scraps aren’t exposed, even if you have a lid (see below how we covered our greens over once we put them in. This creates layers which are ideal).
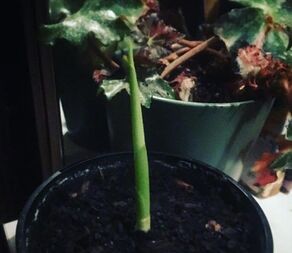
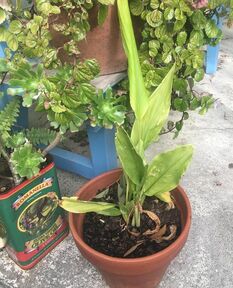
5)Think about adding some other bits like mushroom mulch to help the process, coffee grounds (considered as ‘greens’) and, if the smell is unbearable (which it shouldn’t be with the right ratio of greens to browns) you can mix in a bit of limestone. Just to make things a little more complicated, there are a few other types of composting that you could consider trying. Whether you use aerobic decomposition (‘normal’ composting) or another type just depends on your needs, such as how many scraps your household produces, how much compost you are wanting to produce and how quickly, as well as what sort of things you are wanting to compost. Bokashi composting: This method isn’t exactly ‘composting’ but a fermentation process. You don’t need any ‘browns’ for this process either, just simply add food scraps to the bin, as well as the ‘bokashi mix’ (containing micro-organisms that induce the fermentation process). Once full or left to ferment for a time, the waste is then buried underground and mixed with soil. You can create a ‘bokashi pile’ and keep adding compost to the same spot. Bokashi bins are also great in that they create ‘bokashi juice’ to fertilise your garden. Pros: -We think this method works well for household who produce a lot of kitchen scraps -The process is really fast, you can have some really nice nutrient rich soil as soon as 3 weeks from burying. -Don’t need to collect no pesky browns, all you need is there and ready to go. -You can compost things you usually can’t when using other methods (meat, dairy, eggs, etc). Cons: -For some people it can feel a little more involved. You have to drain fairly often, and how much juice you get can depend on what you put in your bin. -Doesn’t smell the best (that’s what you get for not using browns) For more info, check out the bokashi website https://www.bokashi.com.au/Bokashi+One/How+it+Works.html Worm farms: Worms farms are so fun! Who doesn’t want to harness the power of thousands of squiggly little creatures to deal with your kitchen waste? They’re fairly similar to aerobic (‘normal’) composts in that they require similar conditions and browns vs greens, but there are a few differences. Pros: -Fairly low maintenance- just need to be in shade in summer so that the worms stay happy. -Can collect compost juice and is the best compost juice around! -No real problems with attracting mice/other pests -Smell doesn’t tend to be as bad as other aerobic composts. Cons: -A lot of worms are needed for it to be effective (around 1000 per person) -Not efficient for a large composting need- okay for 1 or 2 people with fairly low food waste. -A bit gross, or a bit fun if you like worm -Cannot add animal products (unlike aerobic which you can add everything other than meat) -The process is painfully slow (a lot slower than aerobic composting, which is in the middle between bokashi’s (fastest) and worms (slowest). For more info about worms, check out the ‘Worm Lovers’ worm blog: https://www.wormlovers.com.au/ There is no better time than now to get your compost on! Grab a bucket, find some browns, grab some worms, collect your kitchen scraps and you’re good to go! Just about everyone has sprouted a potato, even if it was by accidentally leaving it in the dark of the pantry for too long. More often than not I’ve sliced the sprout off the potato and thrown it away to avoid a further plague of potatoes growing in my garden and compost. As it turns out, there are loads of other roots and vegetables that can be grown from left over scraps. Some of these include: -Sweet potato -Turmeric, ginger -Celery -Carrot, beets, turnips -Onions -Fennel -Bok choy, lettuce, cabbage -Avocado -Various herbs For example, here is my turmeric plant when it was still a baby sprout (beginning of 2020) vs now.
Some of these vegetables such as Celery, lettuce and cabbage will reward you quickly as the edible part of the plant begins to grow back. Others such as carrots and fennel must grow a plant that flowers and seeds in order to obtain vegetables from the propagated plant. If you’re an indoor plant person, both carrot and sweet potato plants make excellent additions to indoor plant collections, regardless of whether you eventually manage to obtain vegetables from them or not. Here is a sneak peek at my baby sweet potato vine who likes to live on my bedroom windowsill.  Propagating Root vegetables: The same method of propagation can be used with most root vegetables. Root vegetables include Potatoes, turmeric, ginger, carrot, turnip and beetroot. You can purchase vegetables with the sole purpose of leaving them in a cool, dark place to sprout, or you can try your luck at finding an already sprouted root when you do your shopping. You can plant the root vegetable without the sprout; however, it may take a little longer to grow and isn’t guaranteed to. Carrots, beets and turnips are a little different in that you just need the top of the vegetable where the plant is/ was to propagate it. Once you have either a root with a little sprout or a root top, place it in a shallow bowl of water, covering around half of the bottom of the root with the sprout/ top facing up. You may need to slice the vegetable so that is sits flat on the bottom of the bowl. If you leave the bowl on a windowsill, in time it will sprout and begin to grow a small plant. Once the plant is around 10-15cm high, it can be plotted in some soil to live out it’s happy little life! 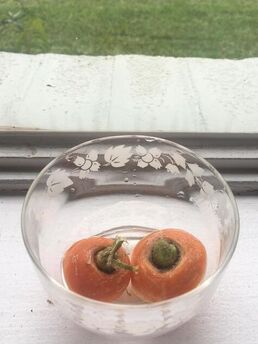 Regrowing celery, fennel, onion, garlic, lettuce, herbs and bok choy:
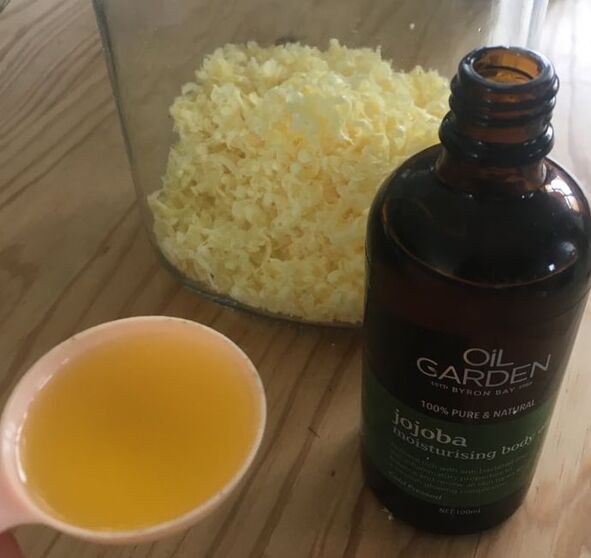
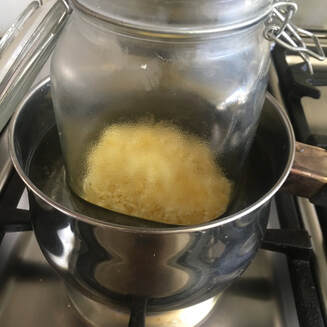
Propagating all the herbs and veggies listed above is similar to the method for root vegetables, except it requires the bulb or bottom part of the vegetable. Take the bulb, stem or part of the plant where the roots once existed, and place in a bowl or jar of water. Once again, place in a warm windowsill position and watch the roots grow. Herbs can be planted fairly soon after roots have established, or they can just be kept looking cute in a jar of water. Soon after roots have established, the edible part of the plant will begin to grow up from where it originally existed. Onions and garlic can be planted in the garden soon after roots have grown, where as other vegetables such as celery, fennel, bok choy and lettuce should be left to establish a bit before planting in the garden. Propagating Avocados: You’ve probably seen avocado propagation floating around socials recently. With the rising popularity of both avocados and indoor plants, having a little avocado plant on your counter or coffee table is the new trend. When you’ve finished using an avocado, take the pip and give it a wash. Make sure that the pip is not pierced or broken anywhere. Prepare a jar of water to place the pip in. Locate the bottom and top of the avocado. This can be a little tricky, but the top usually has a bit of a point and the bottom is usually a little flatter. This is important to do as the top is where the plant will sprout from, and the bottom where the roots will appear. Using 3 or 4 toothpicks, pierce the middle of the pip evenly around the circumference. If you angle the toothpicks downwards slightly, it will help balance the pip better. Then, place the bottom half of the avocado in the jar/ bowl of water with the toothpicks sitting on the rim of the jar to keep the top half out of the water. Keep your avocado seed in a bright, warm spot. It could take up to 8 weeks, but the top of the pip will begin to dry and eventually crack, allowing the sprout to emerge. A taproot will also eventually form from a crack in the bottom of the pip too. Once the new plant is around 15cm tall, pot it in some rich soil to give the plant some much needed nutrients. At this point, you can cut the plant back a little to encourage even more growth (avoid cutting no more than 10cm) Regrowing veggies is such a fun and exciting activity. I can help with minimising food wastage as well as the costs of purchasing seedlings and eventually veggies during the weekly shop. Even though it does require a bit of patience, you will soon be rewarded. Happy growing :) Everyone loves a good bees wax wrap! They’re trendy, extremely wholesome, and a great way to keep your food packaged and fresh without using plastic. If you haven’t heard of bees wax wraps before (to my surprise one of my housemates hadn’t) then I’ll give you a quick rundown. The growing initiative to avoid plastic has prompted an alternative to the ever so practical clingwrap. Although there are many replacements (such as Tupperware), bees wax wraps are one the most popular. A square of cotton fabric is coated in bees wax, and sometimes other oils and resins to create a reusable, somewhat adhesive wrap that keeps food fresh. You’ll find bees wax wraps in sustainable- based stores, gift shops and most hipster laneway boutiques. There are hundreds of online recipes and tutorials for making bees wax wraps, and so many different methods. There is no real right or wrong, and it just depends on how sticky and pliable you would like you bees wax to be. Some people won’t use a wrap unless it always sticks to the bowl they’re covering; other people don’t mind too much if the wrap slips off after a while. The following recipe is a little in the middle, but we’ll also let you know some tricks to help your bees wax adhere well. What you’ll need: -Bees wax- you can either get a bock and grate it or in pellet form -Jojoba oil- you can do without, but it does make the wraps more pliable -Spare cotton fabric- could use an old sheet or check out an op shop -Drying rack -Measuring spoons and cups -Basting brush -Mixing spoon -Tongs -Saucepan -Mason jar or metal bowl -Large baking tray lined with baking paper or foil 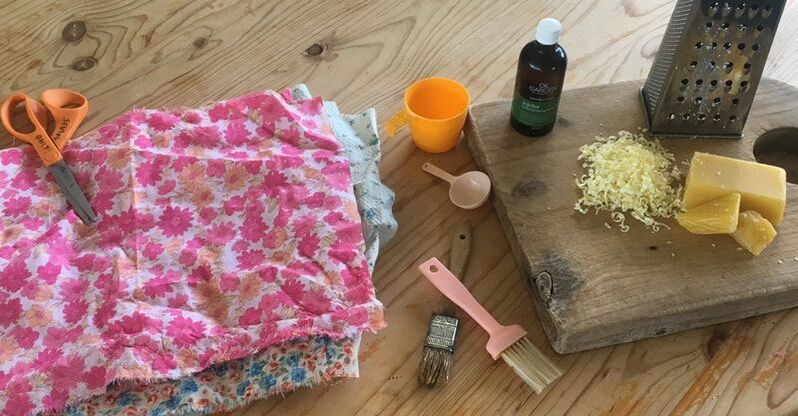
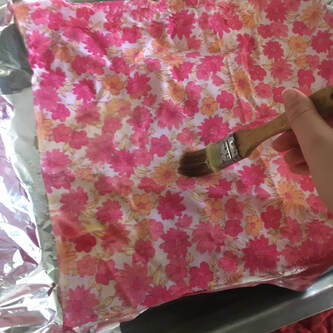 Step 3: Turn oven to 150°C, line baking tray and place fabric on tray. Using basting brush, cover fabric with a thin layer of wax making sure to thoroughly cover the edges. Then turn fabric over and repeat on the other side. Don’t worry too much if the middle of the fabric is patchy or the wax begins to harden, the oven will fix it. Step 4: Once Fabric is covered in melted wax and jojoba mixture on both sides, place tray in oven for 3-4 minutes or until wax is remelted and covering all of fabric, using tongs flip fabric over and place in oven for another 2 mins. Step 5: Take tray out of oven, using tongs pick up fabric and place on drying rack. Repeat as many times as required to use up all the wax. If more wax is needed, simply add more to the mason jar, place saucepan back on heat and stir until melted. 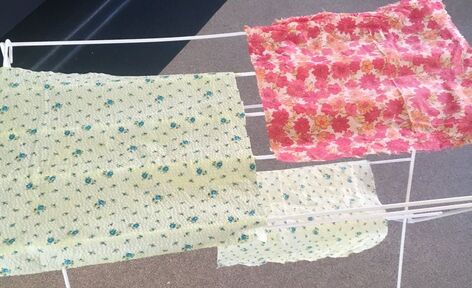  I found my bees wax wraps to dry and set fairly quickly. Giving them a scrunch helps them become more pliable and helps them stick better. Before using my wraps, I often give them a scrunch for a bit as the heat of my hands also helps them stick better. If you’re one of those people who can’t handle a bees wax wrap that doesn’t adhere well, I recommend adding some form of nontoxic resin to your mixture. Pine resin is a popular one used in bees wax wraps. You can easily order it online and play around with what ratios or wax, resin and oil work well. Remember to find sustainably sourced resin and check out any possible health implications before trying it out. These homemade bees wax wraps should last for over a year. When they begin to look a bit tired and wax-less, all you need to do is re- wax them using the exact same method and voila, good as new. If you have any bees wax wrap related questions, feel free to leave a comment below!
Happy crafting! When we hear the words ‘ecology’ and ‘biodiversity’ they can bring up images of thriving rainforests, coral reefs or native bush. But, have you ever stopped to wonder what the ecology of your own garden might look like? What advantages increasing the biodiversity in your backyard might bring? Our gardens are places that we want to be filled with life and growth of veggies, fruits, flowers and decorative plants. For this growth to be achieved in a balanced and sustainable way though we need to consider the health of the mini-ecosystems we’re creating! Considering the mutually beneficial relationships that make all the elements in your garden is an important first step in building a thriving garden! 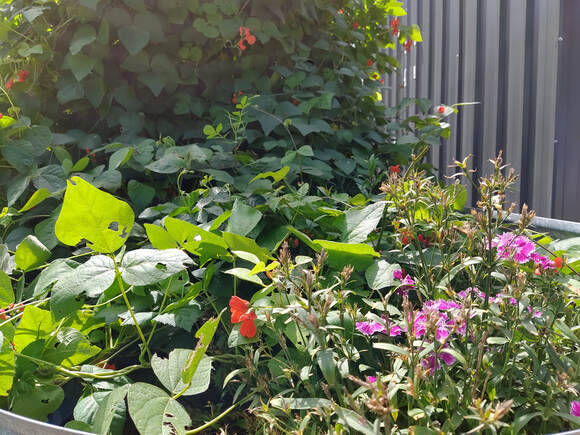 Companion planting/plant buddies: Companion planting is all about growing together certain plants that benefit each other and the wider ecosystem. Mimicking the natural world’s tendency to grow in balance with the environment around it. Some of the benefits of companion planting:
Environmental Weeds: Some plants are invasive and will dominate a garden, this might be ok if it’s an edible pumpkin that you harvest but what about longer lasting vines, shrubs and trees? It’s important to consider the potential for some plants to dominate and take over your garden, even spreading to neighbours or local bushland. Some natives can become environmental weeds too if left to grow wild and may need to be managed to prevent them from dominating your garden. So before planting make sure to check for any potential weeding plants and consider pots or other options (like companion planting or shading out) to manage them. Attracting pollinators and beneficial bugs: We can’t underestimate the importance of attracting pollinators to our gardens. In fact, it’s estimated that more than three quarters of our fresh food crops rely on insect or animal pollinators to fertilise and grow! (see here for more). Lots of bugs and insects play a vital role in controlling unwanted pests by eating them! For example, ladybirds eat aphids that might damage your brassica crops (broccoli, cabbage, cauliflower). A simple way to attract more life to your garden is to let your lawns or any grassy areas grow a little longer. This gives the grasses time to flower and attract bees, butterflies and other beneficial bugs to your garden! Another bonus is you’ll have a lush, soft lawn to enjoy bare foot too. (note; some landlords may not be happy to see an ‘overgrown’ lawn so you might want to run the idea by them first if renting, or mow just before any inspections!) Native plants:
Including some native plants in every garden is a great way to increase the native animals and insects and provide a more suitable habitat for them. Many of these insects and native animals aren’t interested in your veggies and may potentially improve your garden harvests (see pollinators below!). Planting natives will also bring many benefits to the ecology of your neighbourhood. Before going out and planting natives however, it’s important to consider which are ‘indigenous’ to your local region. Indigenous plants are those that were local to your region before European settlement. Ask yourself; what plants originated and are found naturally in my local region? What plants do I see in local remnant bushland reserves? Some indigenous plant nurseries:
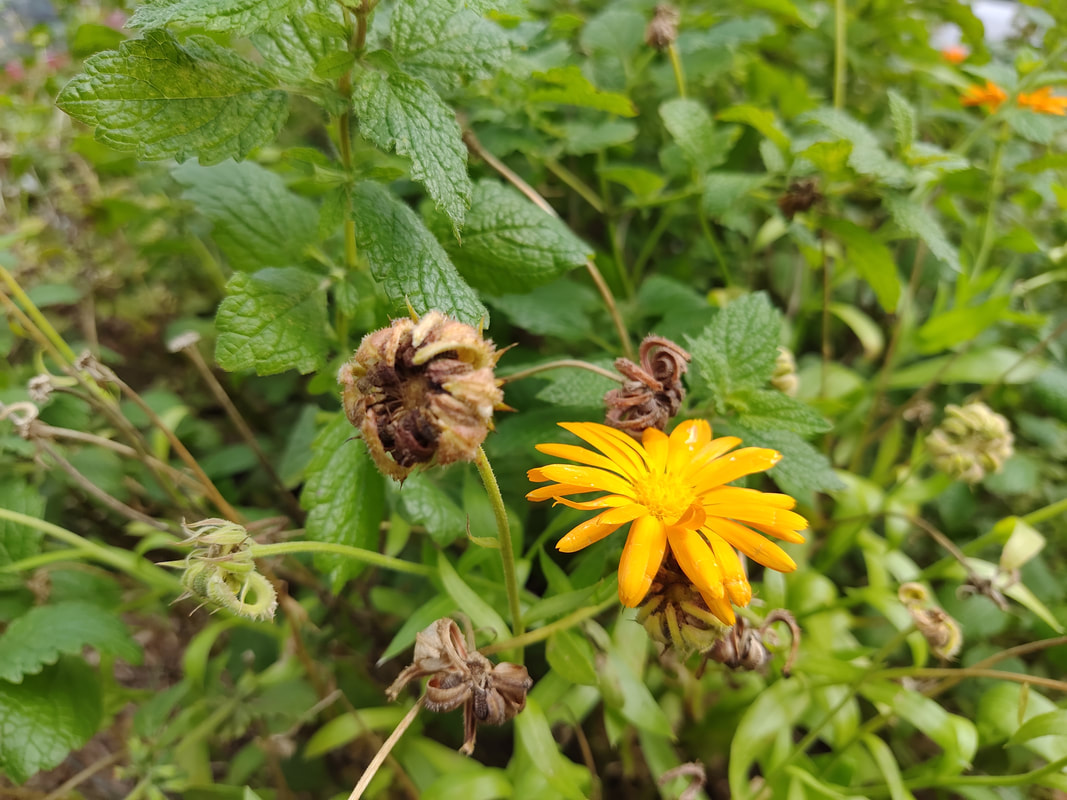
Indigenous Gardening in Whitehorse Booklet and Indigenous plant list: https://www.whitehorse.vic.gov.au/waste-environment/trees-and-gardens/indigenous-plants Monash Gardens for Wildlife Program https://www.monash.vic.gov.au/Services/Environment/Council-Leadership-and-Actions/Plants-and-Animals/Monash-Gardens-for-Wildlife-program Just think, if all of us were to increase the biodiversity in our home gardens just a bit we would collectively have a massive positive impact on the health of our local flora and fauna. Remember, a garden full of diverse plants and animals will be more ecologically stable and resilient to potential threats like climate change too! Happy gardening and mini-ecosystem building! There is no worse feeling than discovering your newly sprouted seedling has been devoured by a savage insect, possum or bird. Pictured below are the remains of my beloved sunflower, which opened the very same day the cockatoos destroyed it. 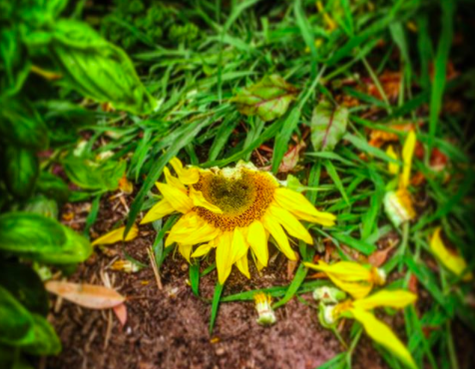 Here I’m going to share with you some ways to keep the creepy crawlies that munch your veggies away. Although possums and birds are another level entirely and I can’t say I’ve mastered keeping their trickery at bay. My first and probably most crucial tip is to remember to respect the small creatures that make a meal out of the veggie garden. We can’t and shouldn’t try to control nature, and it’s an important thing to remember before we reach for the snail bait. Little creatures are beneficial for our garden (check out our Bug Hotel blog!) and we should welcome them. I know using poison works well, but If you’re wanting to be considerate of all the living things that benefit from your garden, including yourself, I’d stay right away form it! Your garden is an ecosystem which relies heavily on all the components to work together. If you’re adding poison (even weedkiller) to this ecosystem it’s guaranteed to cause some harm. Here are my top tips for encouraging the bugs to avoid destroying all the green in sight. Curry powder: This is a trick my Nanna taught me. She swears that adding a circle of curry powder around the base of your plant will help keep the bugs away (sounds like some 17th century witchcraft I know!). She also goes a bit crazy with this and sprinkles curry powder all over her plants to ensure nothing eats it. So, I decided to give it a go. Unfortunately, my Kale at home has been invaded by a few too many snails and cabbage moths. First, I pulled the remaining snails off and relocated them to the agapanthus (far away from my vegetables!). I then added a small circle around the base of my Kale stalks. Because my kale plants are so tall, I also dusted a small amount on the leaves of my plants as well. 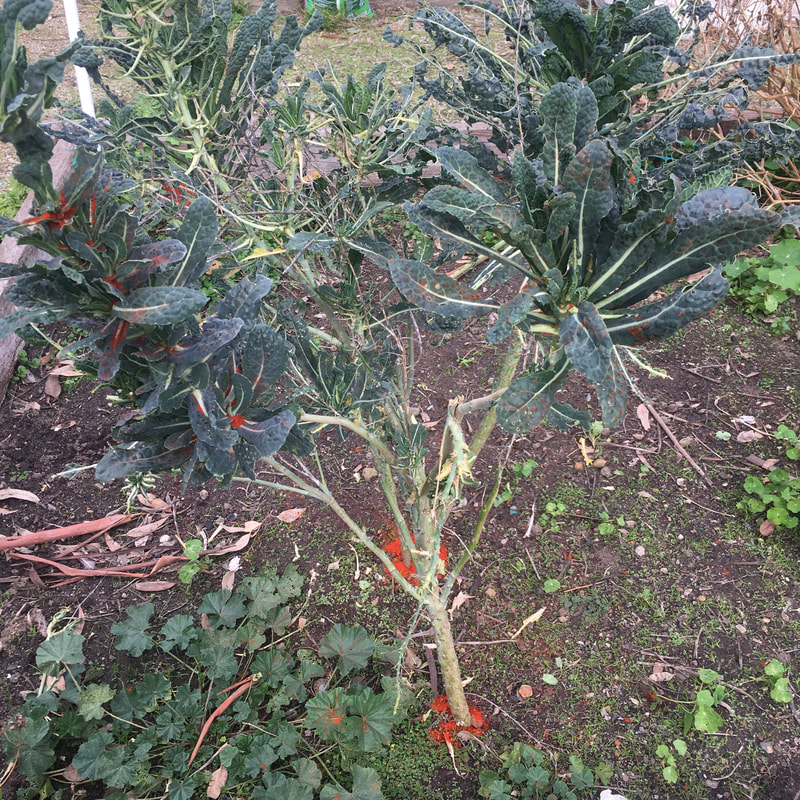 I’m sure the curry powder will wash off fairly well, but if you have allergies or are not a fan of curry, this might not be the method for you. According to Nanna, Turmeric and Paprika also work well. In fact, here is a picture on Nan’s Zucchini plant covered in turmeric. You’re welcome.  Coffee grounds: Similar to the curry powder trick, snails hate coffee grounds. Adding a few to the base of your plants will not only keep the snails away but is also a great source of nitrogen for your soil. Better yet, if you frequently add coffee grounds to your compost (which I suggest you do), and then add the compost soil to your garden beds, I’m sure this would help deter snails equally as well. Biological control: This method involves utilising predatory insects to control other pest bugs. There are many ways to encourage predatory insects like spiders, ladybugs and centipedes into the garden (maybe make some bug hotels!) but sometimes just simply keeping the pest bugs in your garden for the predators to feed on is enough. An example from my garden is on my native African bush fruit plant (unfortunately have forgotten its name). Last summer I noticed a few aphids on the plant, not so many yet that the plant would die, however if left unattended the aphids would quickly multiply. I decided to wait a week or so as I knew that aphids would attract ladybugs which need a suitable breeding ground before the cooler months. And behold, a big family on ladybugs moved in. The larvae of ladybugs (pictured below) feed on aphids and do wonders for the ecosystem. My plant survived the season, the lady bugs kept the numbers of aphids safe and by leaving the aphids alone, I created a little home for some helpful buggy friends. If you’re having trouble encouraging predatory bugs into your garden, they are available to be purchased online. Just make sure you do some research on what bug will be best to introduce based on the pest you have.  Planting other plants that attract bugs:
Sometimes the bugs love our veggies so much because they have nowhere else to go! Planting some bug- attracting plants close to your veggie patch to offer another option to the insects could be the way to go, such as including agapanthus somewhere near your patch to guide the snails away from the forbidden snacks. Oil- based insecticides: First, it’s important to note that some of these methods do kill the insects and should only be used as a last resort if pest bugs like aphids are seriously out of control in your garden and you can’t get rid of them any other way. They are non- toxic and won’t have any ill effects on your plants or soil. Neem oil is a popular pest control used by plant hobbyists. Neem oil is acts as a hormone disruptor and can kill insects in all life cycle stages. It’s also has anti- fungal properties and can be effective against mildew and other plant killing funguses. An olive oil spray mixed with a natural soap mixture works well. The oil coats the body of the bug, preventing it from respiring. Hopefully you now have the tools to stop your veggies and plants being munched away! Remember to try some bug- friendly methods before opting for the oil spray. Happy gardening. With most of us stuck at home in this pandemic, now is the perfect opportunity to get more creative with our home cooking. As restaurants and cafes are takeaway or delivery only, why not look at ways of recreating delicious dining experiences in our own kitchens? This is a great opportunity to develop some good habits around meal planning and preparing to improve our health while learning new skills along the way! Read on for some tips and suggestions to help inspire you to be more organised in the kitchen by planning and cooking your own meals. Before you start, ask yourself these questions:
Seasonal: Start with planning your meals around what fresh produce is in season. Some of the benefits of eating seasonally are:
Collaborate: If you’re (un)fortunate enough to live with others how about collaborating?
General Tips:
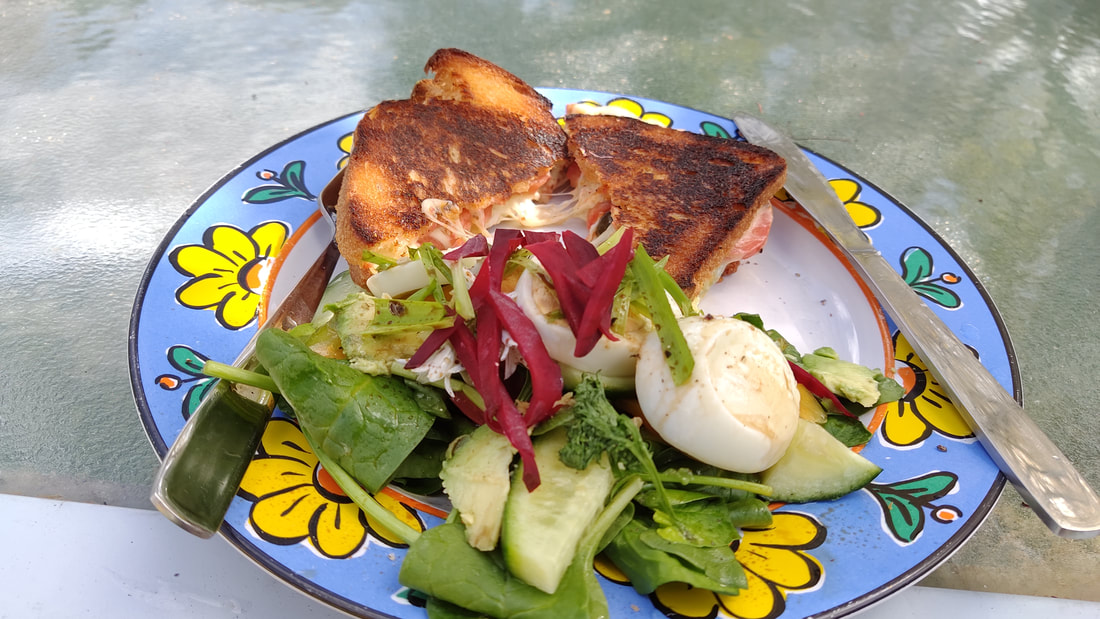
Quick and easy meals: When you don’t have much time and are looking for a quick lunch or easy dinner it can seem convenient to reach for your phone to order delivery. However, in the same time it takes or less for your delivery to arrive you could prepare one of these easy meals yourself! Salads – I know the old saying goes ‘you don’t make friends with salad’ BUT, there are so many interesting takes on salads beyond the typical ‘garden salad’ to try:
Eggs – There are SO many tasty and quick egg recipes out there, you could try:
Stir-fries – The longest part is chopping up the ingredients! Then it’s just a matter of quickly frying everything in the pan and adding some sauce and noodles or rice.
Pizza – Try making homemade pizzas using flat bread bases, tomato paste and your choice of fresh toppings. Noodles – Now this could be your typical 2-minute packet noodles or something more fancy like vermicelli or ramen, whatever you choose, be sure to add some extra veggies and protein for some added nutrition! These are just some general suggestions, have a search online or in a cookbook for more quick and easy recipes to inspire you. Weekly meal cook up: Another idea that works well if you have less time during the week is doing a big cook up once a week. Just set aside a couple of hours on say a Sunday afternoon to prepare a meal or two that you can then store leftovers of for the week. Try recipes that you can easily store (see ‘storage’ tips) and meal bases that you can use in a variety of different dishes. Some of my regular big cook ups include:
Storage:
Recipe websites and resources:
Desserts: I know everyone has their own preferences for desserts and if you’re aiming for a healthy diet you might be trying to limit sweets and treats. But my word of advice would be to include treats in moderation, have it be something homemade and a little healthier. You could try baking a big batch of healthy(ish) muffins using fruit as a sweetener, make a fruit pie, bake or crumble to eat throughout the week. Or you could just stick with some of your favourite fresh fruit as an after dinner/lunch treat! Most of all, it’s about finding what works for you, finding a balance between routine and freedom, healthy and comforting, affordable and treating yourself.
Let’s feed ourselves and our loved ones with scrumptious, healthy, homemade food. Feel free to post some of your favourite recipes below or on our social media pages! Happy planning, preparing, creating and sharing! If you’re a passionate gardener and nature lover, then this project is for you! Invertebrates are really crucial to the health of ecosystems, including our veggie gardens! Bug hotels are even more helpful to have if you live in an urban area as this is where many insects are most threatened. Bug hotels have become very popular lately, mainly for their aesthetic appeal. But some commercial designs are not all that helpful for the insects we’re wanting to have in our gardens. Hopefully this blog gives some insight into the world of garden bugs and provides achievable tips of creating your effective own bug hotel. Why would I want insects in my garden? We know not everyone is super keen on small creepy things with more legs than they really should have, but if a healthy, thriving garden is what you’re wanting, then you may have to make an effort to befriend a few of these leggy bois! Insects pollinate our veggie plants; help break down and produce nutrients for our plants as well as protect our plants from being eaten by not so friendly insects. Here is a small list of bugs you should try to promote in your garden:
Types of Bug Hotels: There are many different types of bug hotels, and what materials you use in your hotel depends on what bugs you’re wanting to promote in your garden. Bees: If you’re wanting to have bees in your garden (maybe check this one with your housemates first), then a hotel with lots of small holes within wood or a hollowed-out log/ box is your best bet. It’s also best to have one/ a few smaller hotels rather than one large one if you’re wanting to accommodate bees. This is because rates of bee parasite infection are recorded to increase when using a larger bee hotel, and parasites are one of the largest threats to the bee community. Making a bee hotel doesn’t mean you’ll have a whole bee colony in your garden. It just means solitary bees that aren’t apart of a hive (yes, this is a thing!) can make themselves at home in your garden. And to avoid attracting a swarming bee colony to make your bee hotel at home, make sure not to place a whole hollowed out large log or box, instead to stick to small holes and spaces where one or two bees could fit. Spiders and other bugs: The use of pinecones, bark, leaves, plastic plant pots, bricks and other bits are great for any other types of bugs. Some spiders need a bit of space to make their webs, so it’s great to pop in an empty plant pot or a hollowed brick or something similar. Beetles and other decomposers like a bit of leaf litter and bits of decomposing wood, which is why pinecones work a treat. It’s also important to consider conflict amongst insect species when planning a bug hotel. It might not be the smartest idea to encourage bees and spiders to live in the same hotel for example (unless you’re wanting to see some serious insect WWE action). Our DIY Bug hotel: Here is the beginning of our bug hotel. We’ve got a bit of space to keep adding to but it’s coming along so far! 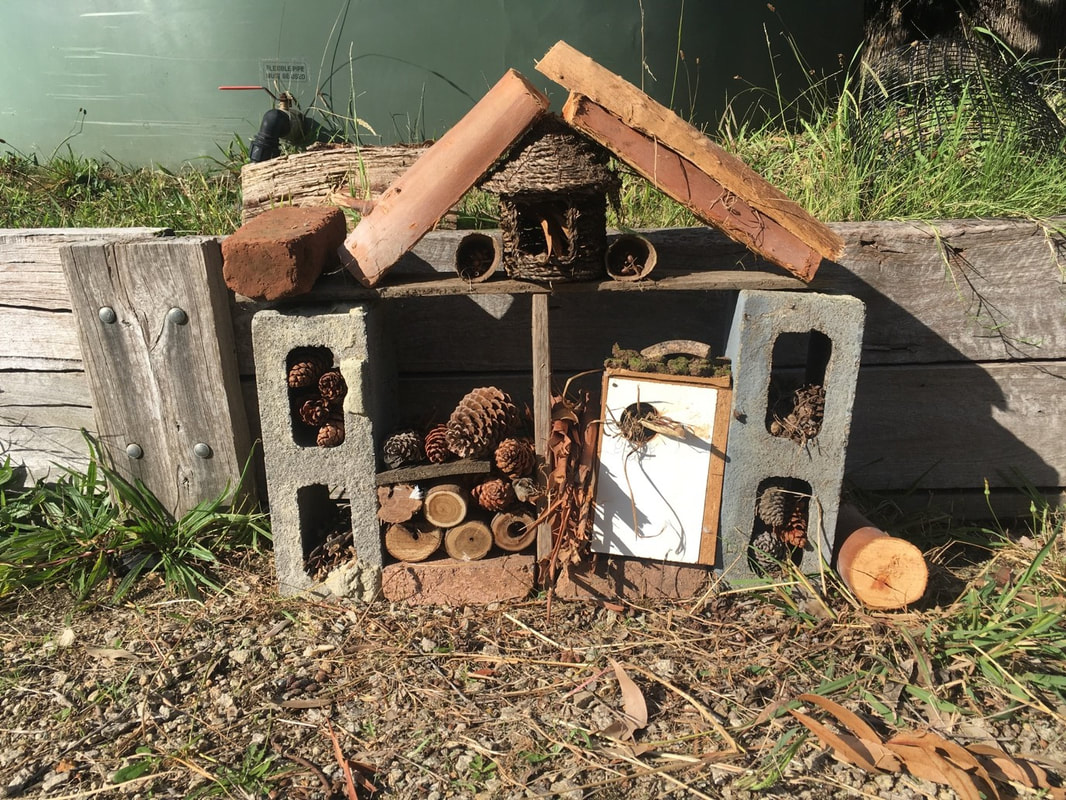 Home-made bug hotel! We didn’t want to attract too many bees due to housemates with allergies (hence the lack of bee appropriate holes), but all other bugs are welcome!
We started off with a simple foundation using the grey bricks and some planks of wood, and then just filled in the spaces with other bits and pieces we found around our house. We went for a walk to collect some pinecones to use too. I’ve included an old bird box with leaves inside to encourage spiders as it’s big enough to spin a web. We also created some smaller spaces using ribbon bark and sticks for other insects. Hope you have fun making your very own bee/ bug hotels. Even if you don’t have a veggie garden at home it’s still a great way to attract insects to your neighbourhood! Happy gardening! So, you’ve decided planting your own veggie patch is the best way to cure your isolation boredom and provide some extra fresh food for your household without having to venture to the supermarket… But how do you actually start growing the plants? And where will you source the seeds from? With many shop shelves bare and more people realising the need to increase their food security even nurseries and hardware stores have been selling out of seeds and seedlings of late. But if we take a moment to look around our houses and neighbourhoods in our local community, we may find all we need to grow our own food from seed. Thinking creatively, improvising and making do with what you’ve got are more important now than ever! Benefits of growing from seed:
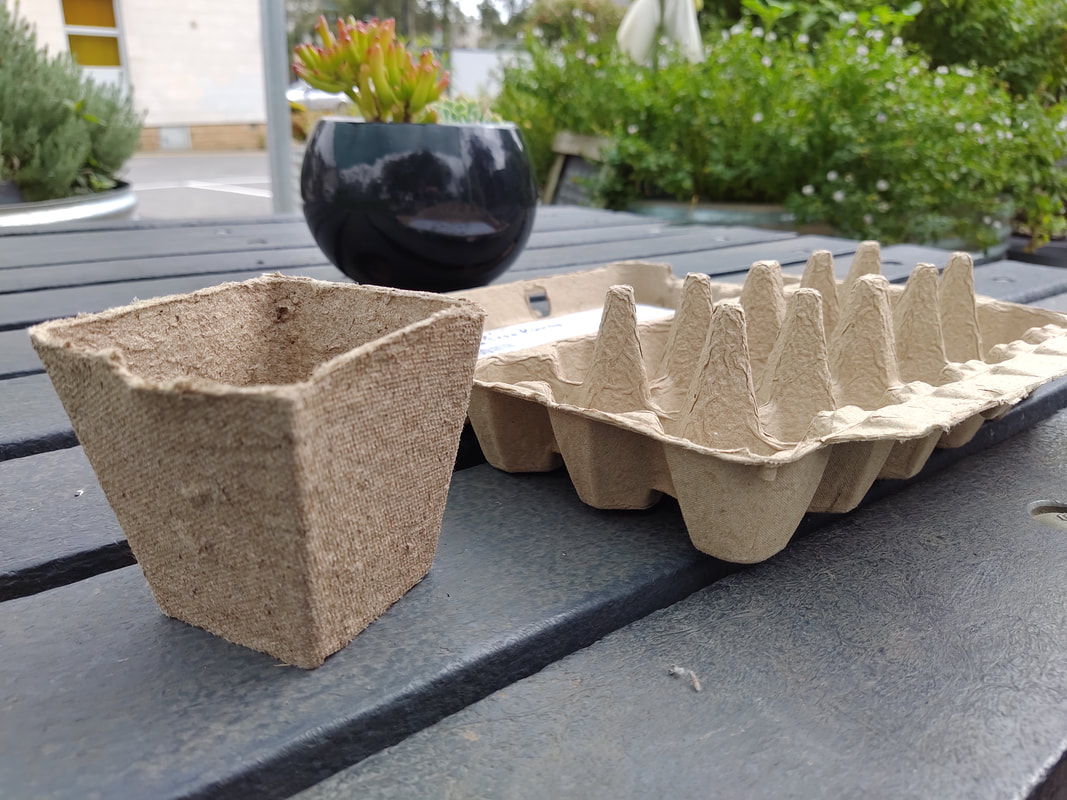
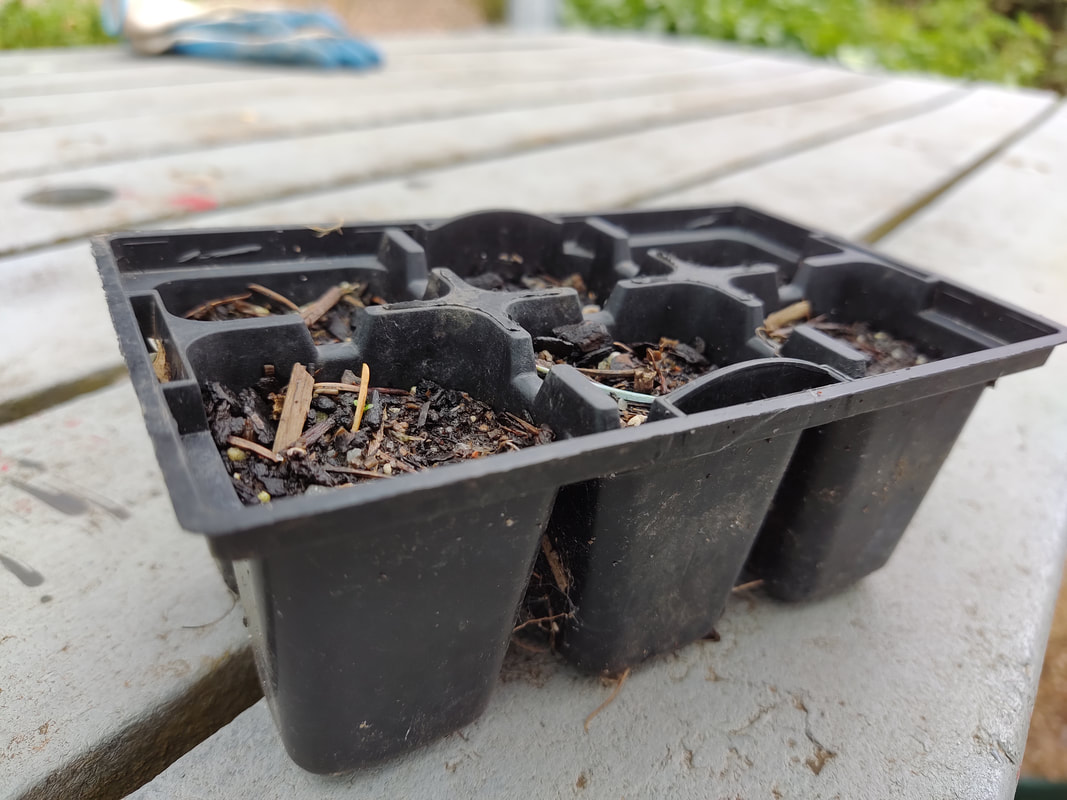
What you will need:
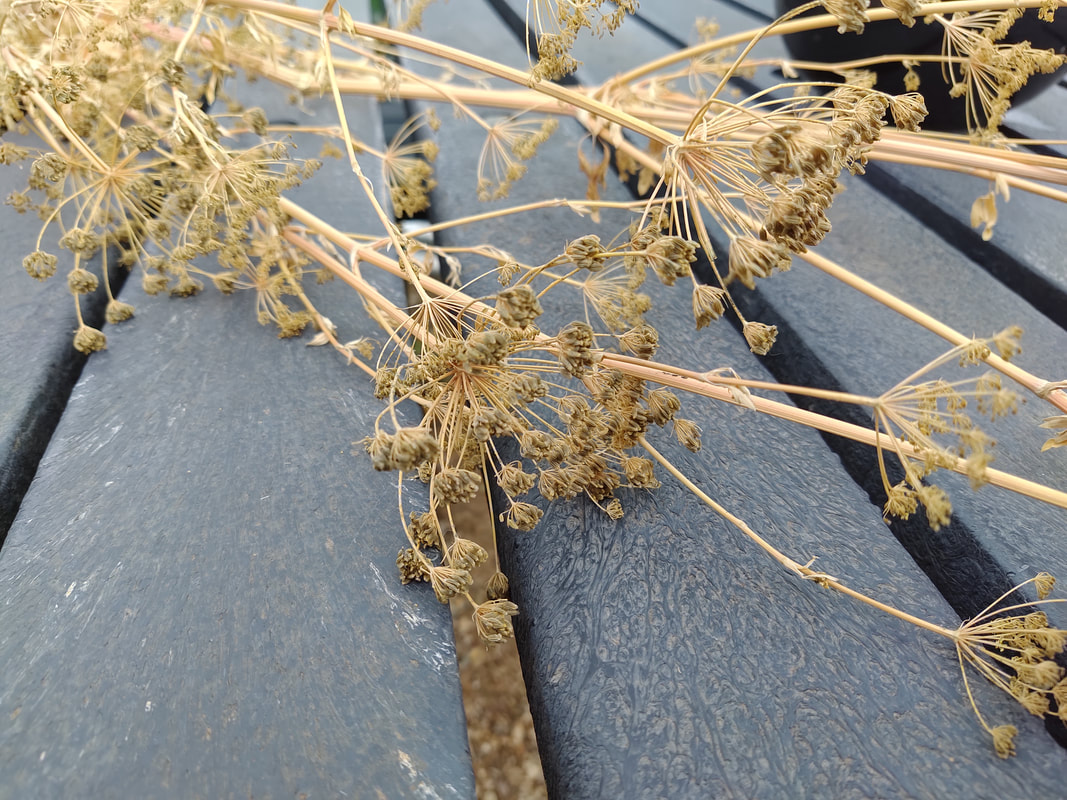
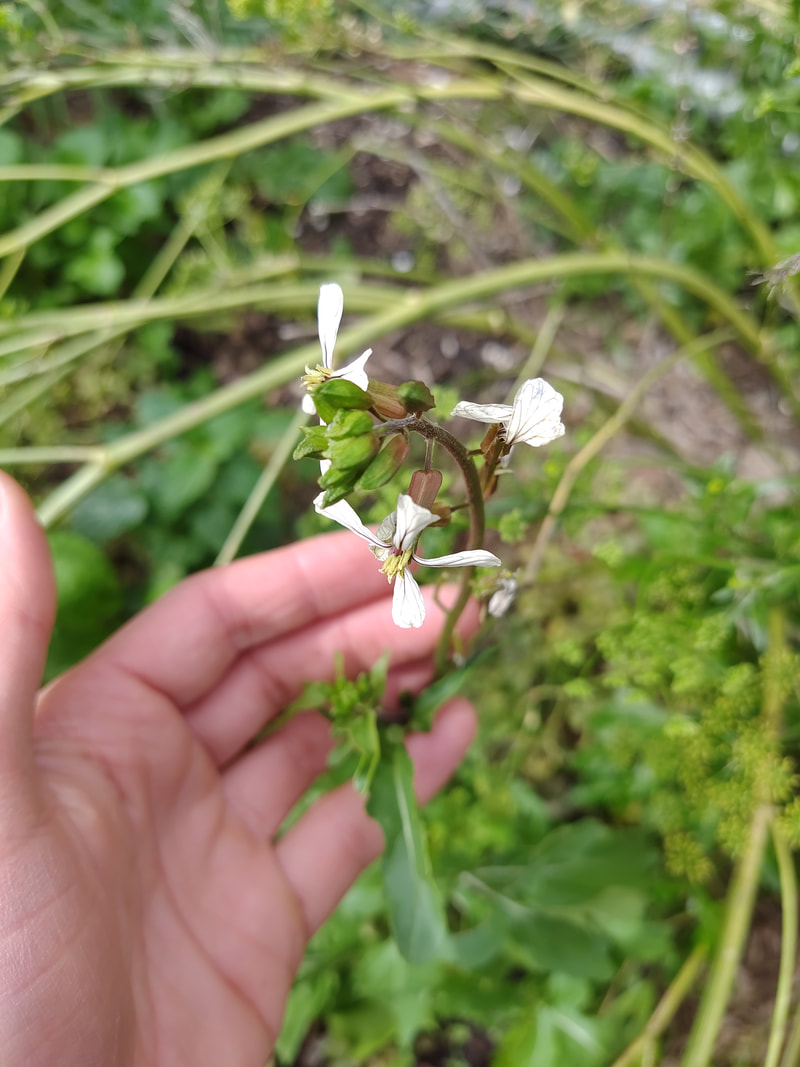
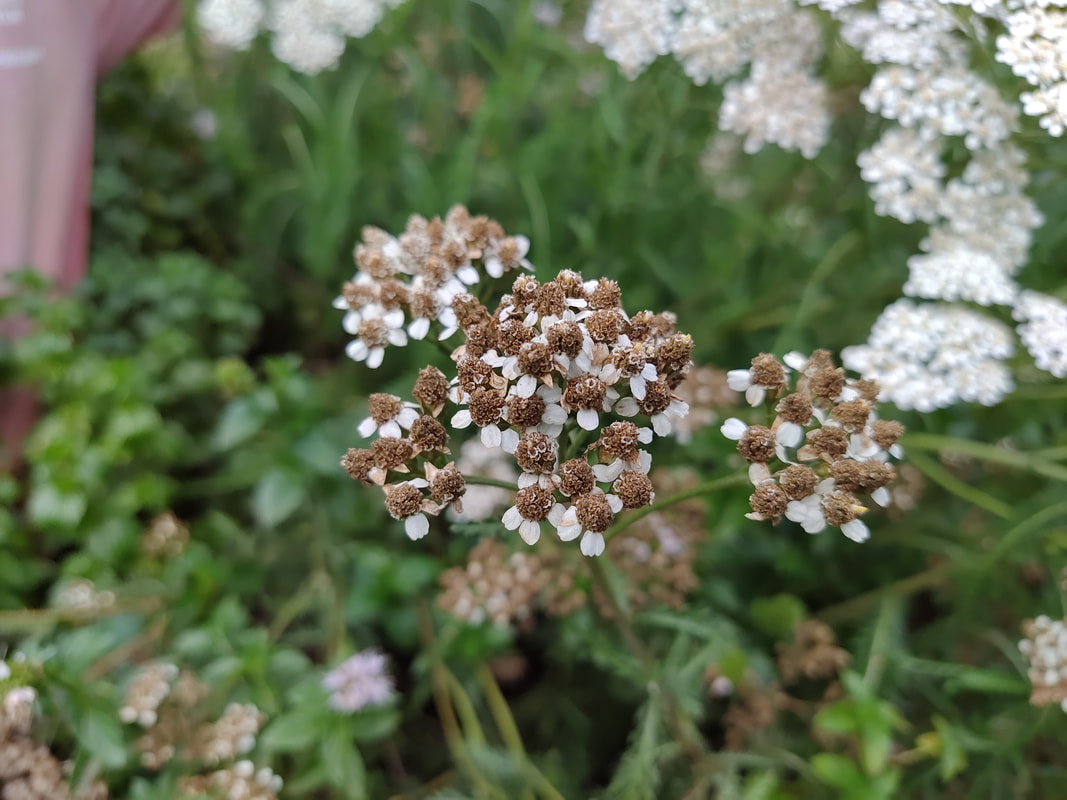
Collecting and sourcing seeds: Start with what you’ve already got, have a look around your kitchen for any potential seeds you could use to grow from fruits, veggies and herbs (try pumpkin seeds, chillies, capsicums, melons, zucchini, tomatoes, or whatever is in season!). Let plants you already have in your garden go to seed – wait until the seed pods are fully mature and drying out while still on the plant, then collect them. Find some herbs or veggies that have gone to seed that you can collect seeds from in your neighbourhood or from friend’s & family’s gardens (why not start your own local seed swapping group). Make sure to dry out any seeds you collect before storing them to prevent mould! Check out ‘Seed saving’ & ‘Seed exchange’ groups on social media in your local area to trade and learn more about seed saving and collecting! Look out for local community groups, neighbourhood houses, and of course community gardens that you may be able to find seeds for free or for trade. Come down to the Deakin Community Garden at Burwood and find a variety of plants that are currently going to seed and ready to be collected yourself! Storing:
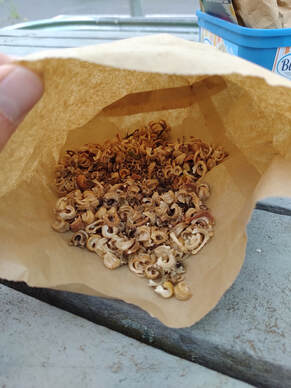 Collecting Calendula seeds in a brown paper bag Planting and growing your seeds: First, remember to check if your seeds prefer to be sown directly into a garden bed/pot or grown indoors until they’re big enough to be transplanted (not most root veggies!) Check a veggie planting guide for when is best to sow each plant in your area for each month before you pop them in (see Gardening Australia, Gardenate, ABC Organic Gardener). Some seeds to look at planting in April might be:
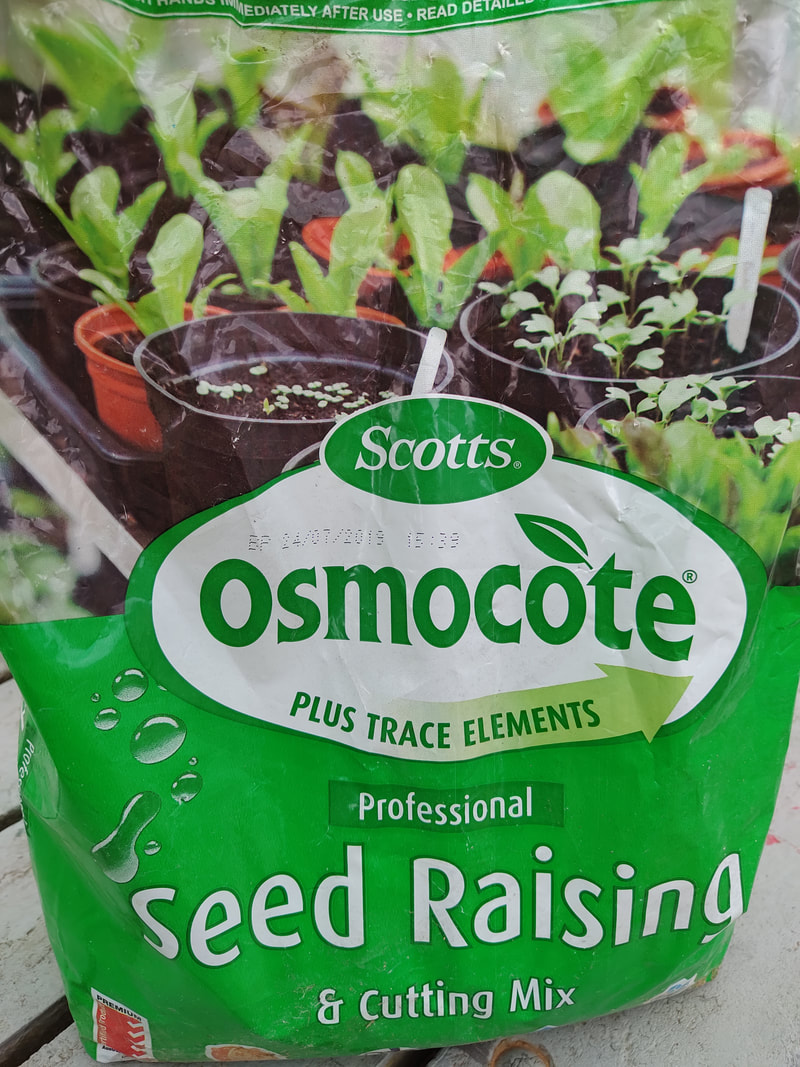
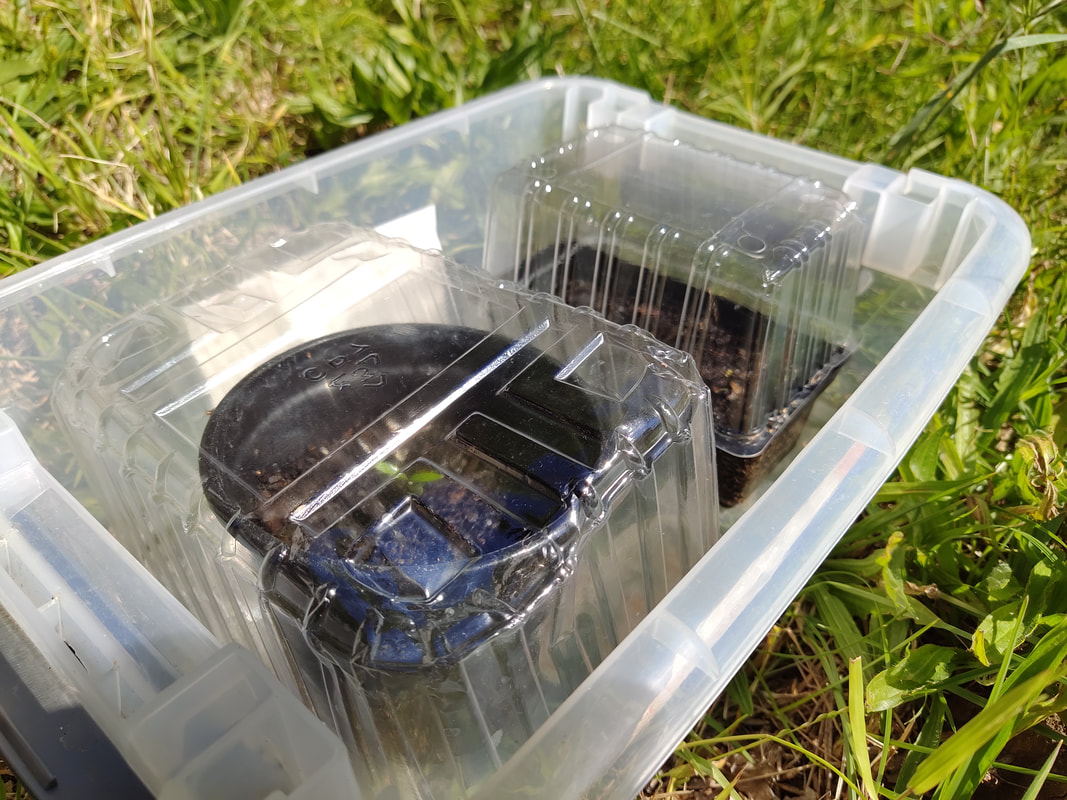
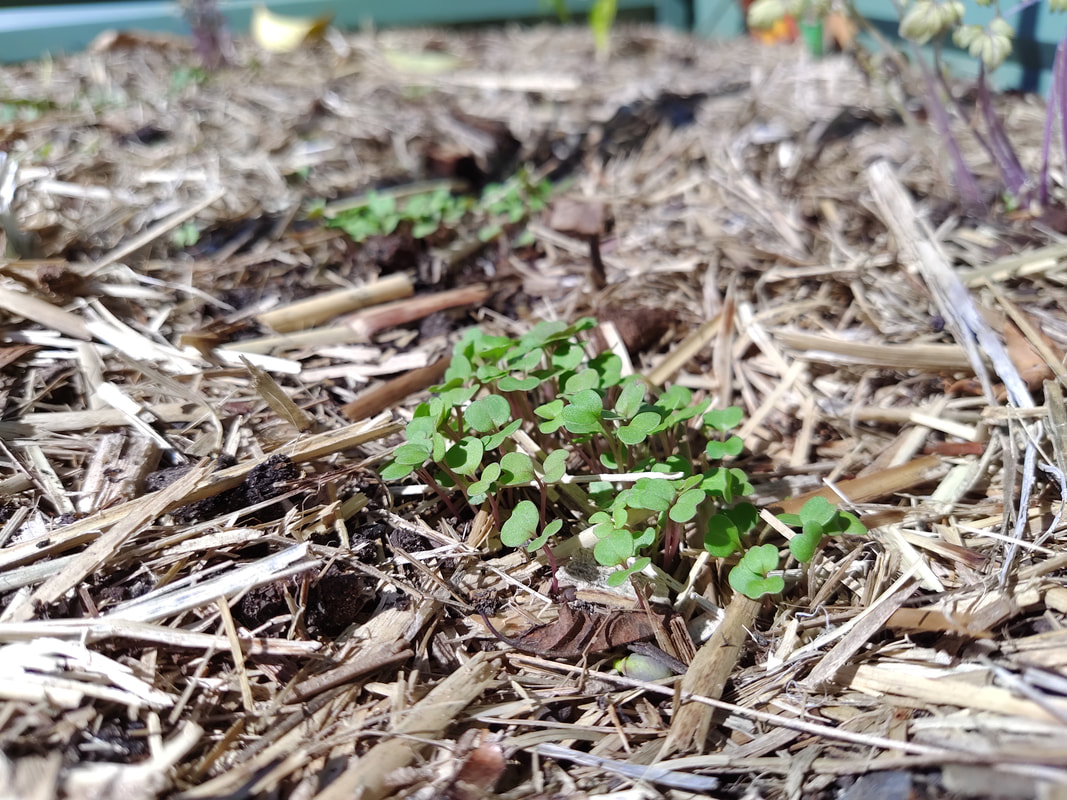
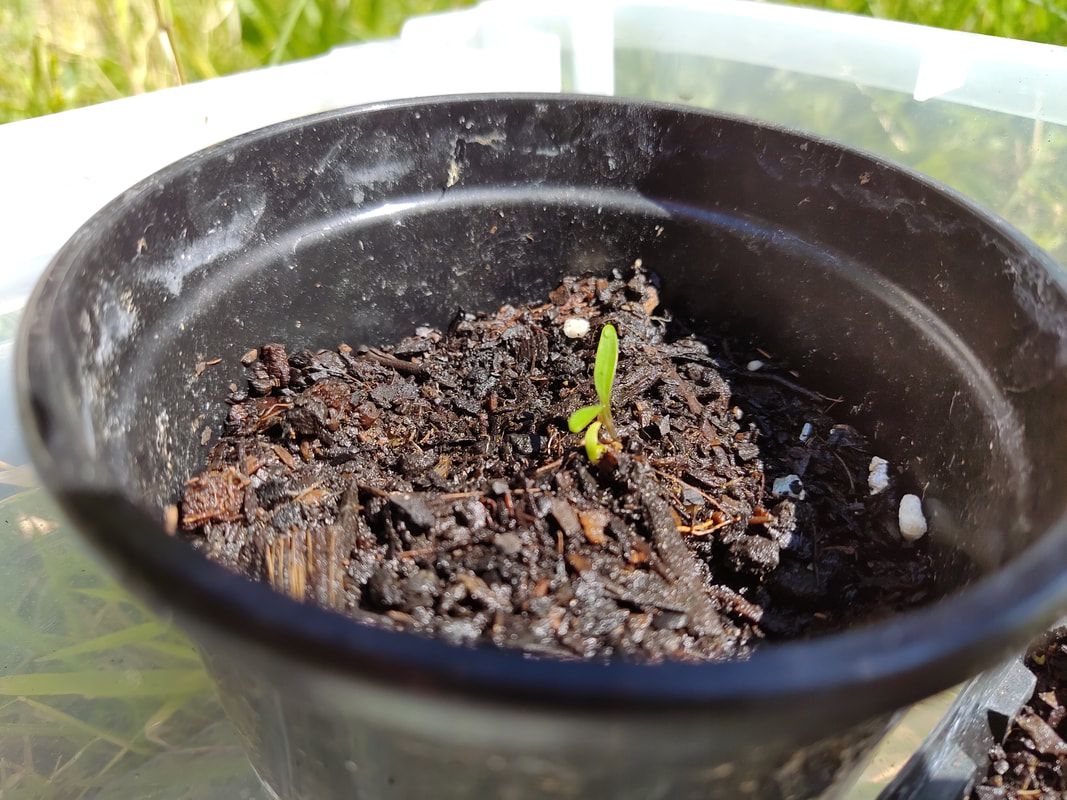
Then fill your container nearly to the top (1cm below edge) of your chosen container with seed raising mix or some good quality soil with a bit of sand/gravel for drainage at the bottom. Make sure your soil is damp, water a little if it needs planting. For small seeds, sprinkling them on top of the soil before covering with a little more seed-raising mix/soil (just enough to cover them). For larger seeds, make a small trench with your finger, plant spaced apart and cover with more soil. When watering be careful to use a fine mist on your watering can/hose, so you don’t wash the seeds away. Alternatively, you could put the container in a dish of water for it to soak up into the soil from below. Make sure to remove them when the water has soaked in or it will get too soggy! Label your freshly planted seedlings with the name and date planted while you remember with a wooden icy pole stick or any other label you can find. In colder weather use a transparent plastic or glass covering to create a mini greenhouse that will warm up and keep more moisture in (cut up plastic bottle, reuse plastic punnet lids). Placement – somewhere sunny and warm like a windowsill or balcony often works depending on the season and the type of plant. Some might need more or less sun and might do better inside or outside, trial a few spots around your place and see what works! Keep soil moist but not soggy, check with your finger every day or two to feel if soil is damp or dry, if it’s dry, it needs a water. When your seedlings have grown to about 5-10cm high depending on type they can be transplanted to your garden bed or a bigger pot. Sharing your own seeds!
Once you’ve successfully grown some plants remember to let a few of them go to seed so you can collect and save some for next time you want to plant them. You can then continue the cycle by sharing your home-grown seeds and produce with your friends, family and community! Let's sow our way to food security together while we're apart, happy growing! |
Author
The happy Deakin Scarecrow family- Russel Scarecrow, Rita Hayworth and Benny Cumberbale |


 RSS Feed
